Adding a Birdychat widget to Wix
Option1: Using custom code.
There are a couple of ways to add the Birdychat widget to a Wix.com site, depending on the plan you have.
With a paid Wix subscription, you can connect your own domain to your Wix website and use custom code to add a Birdychat widget to your site.
If you have a free Wix plan, you can add the widget to your site using an HTML Embed element. However, the widget will need to be manually attached to a fixed footer rather than one that floats.
This article shows you how to add the Birdychat widget using both methods.
With a paid version of Wix, you can add the Birdychat widget to your website using custom code.
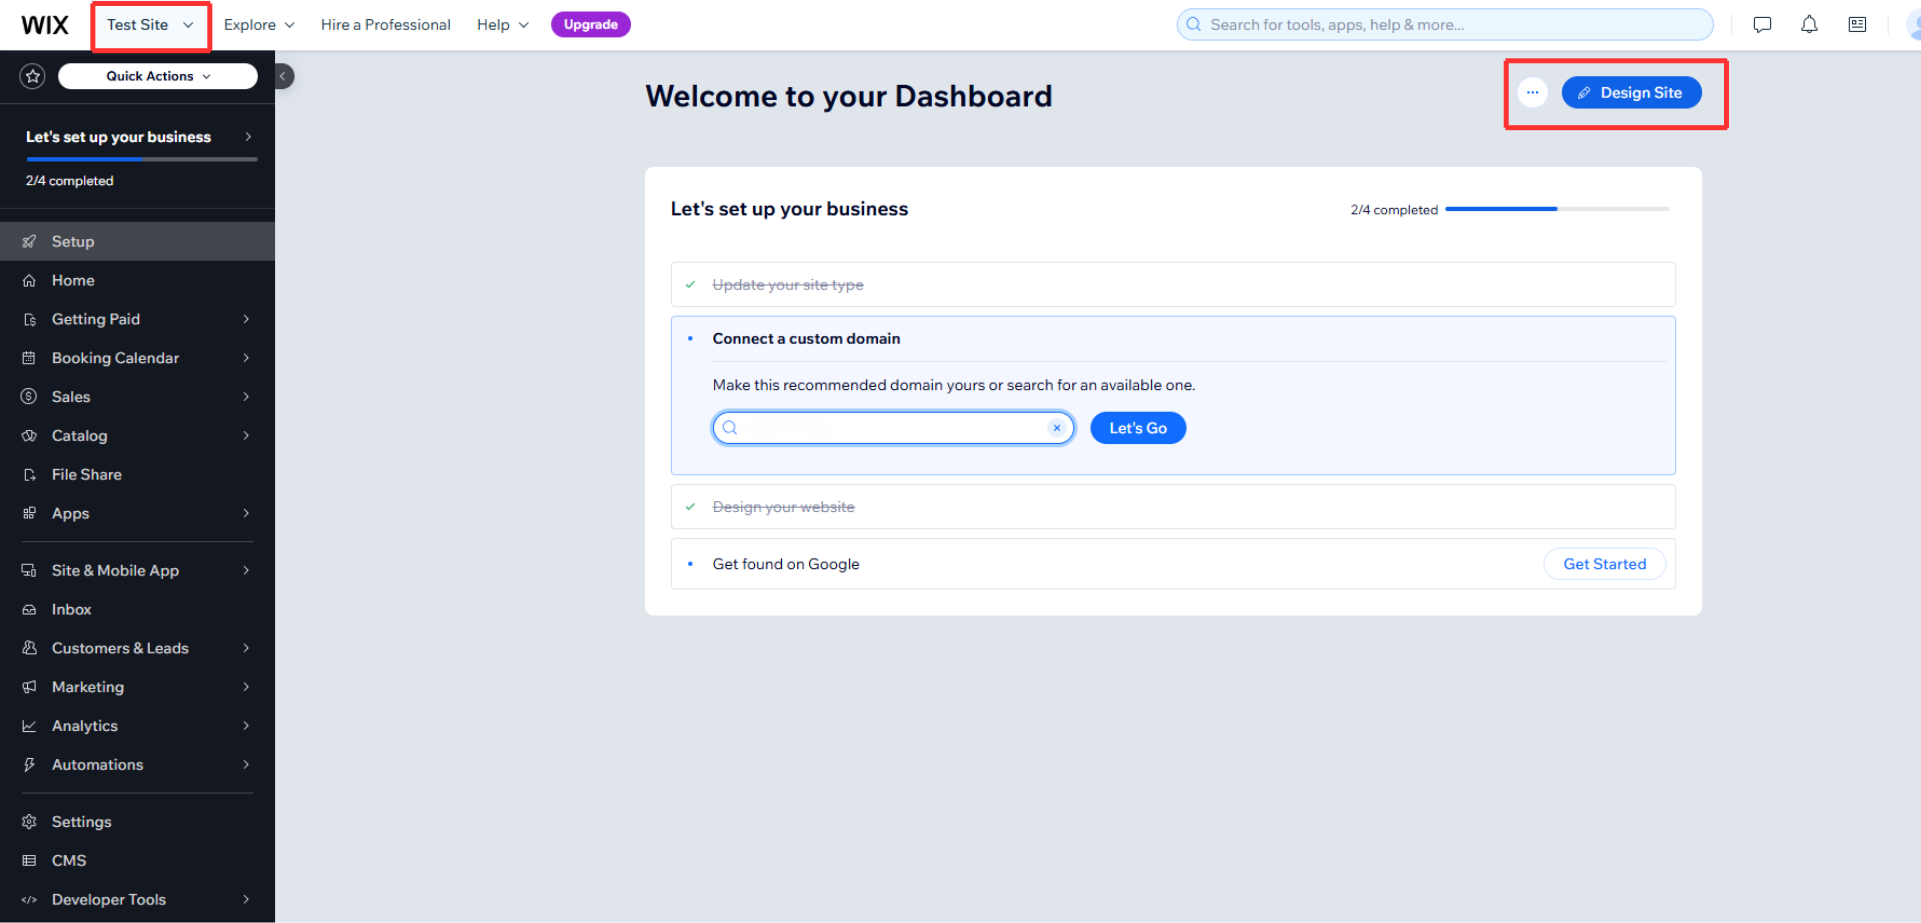
1. Log in to your Wix account. If you have multiple Wix sites, check the current site in the upper-left menu to make sure the correct site is selected.
Then, click the Edit Site or (design Site) button in the upper-right corner.
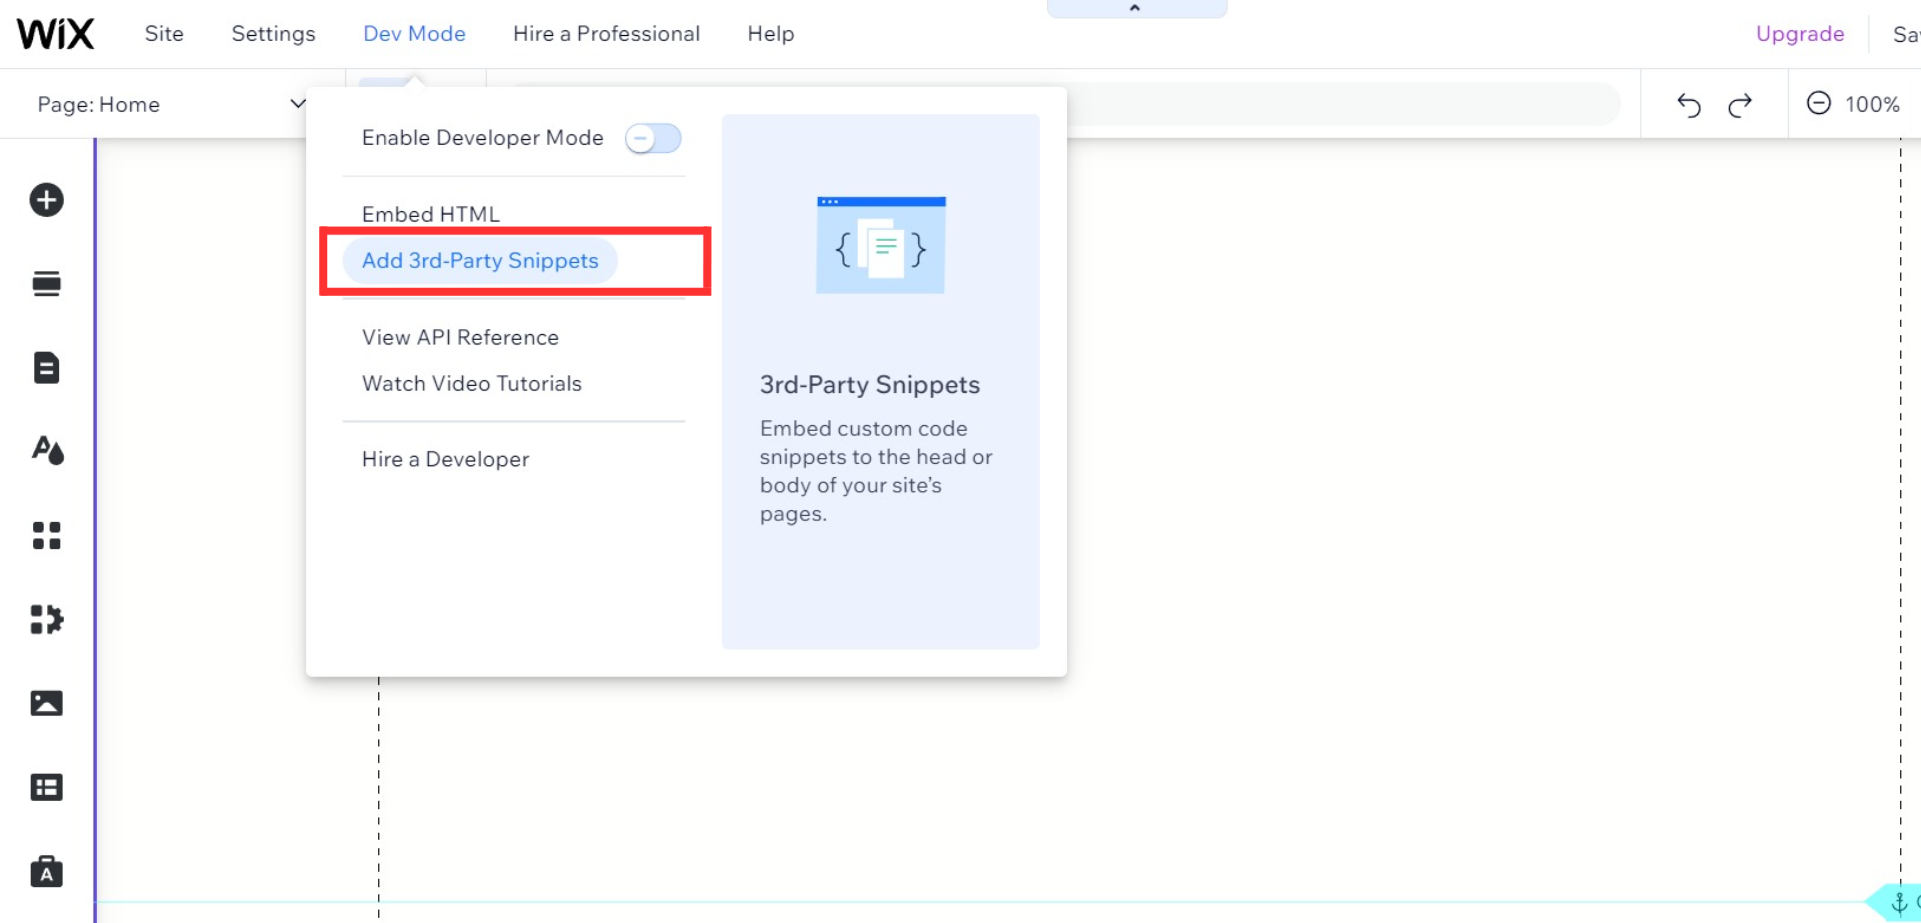
2. In the header menu, select Dev Mode.
Then, select Add 3rd-Party Snippets. You will be redirected to the page where you can add and modify Custom Code.
3. In the Body - End section, click Add Code.
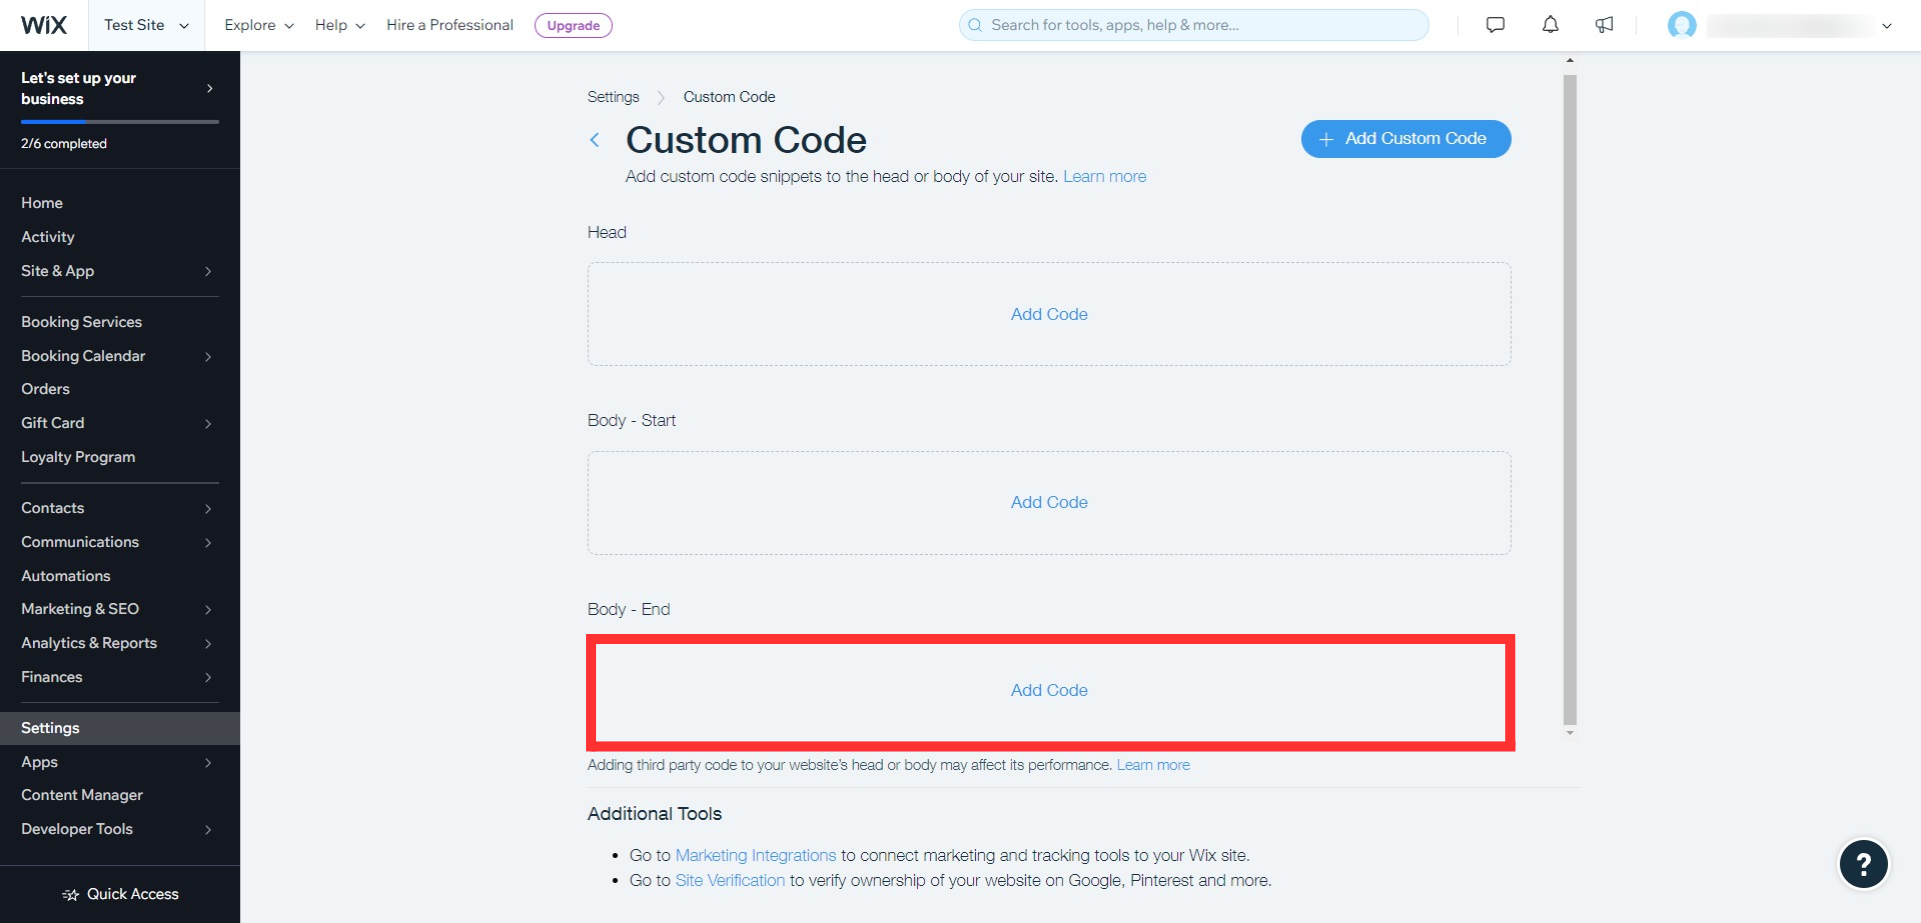
A popup window will appear.
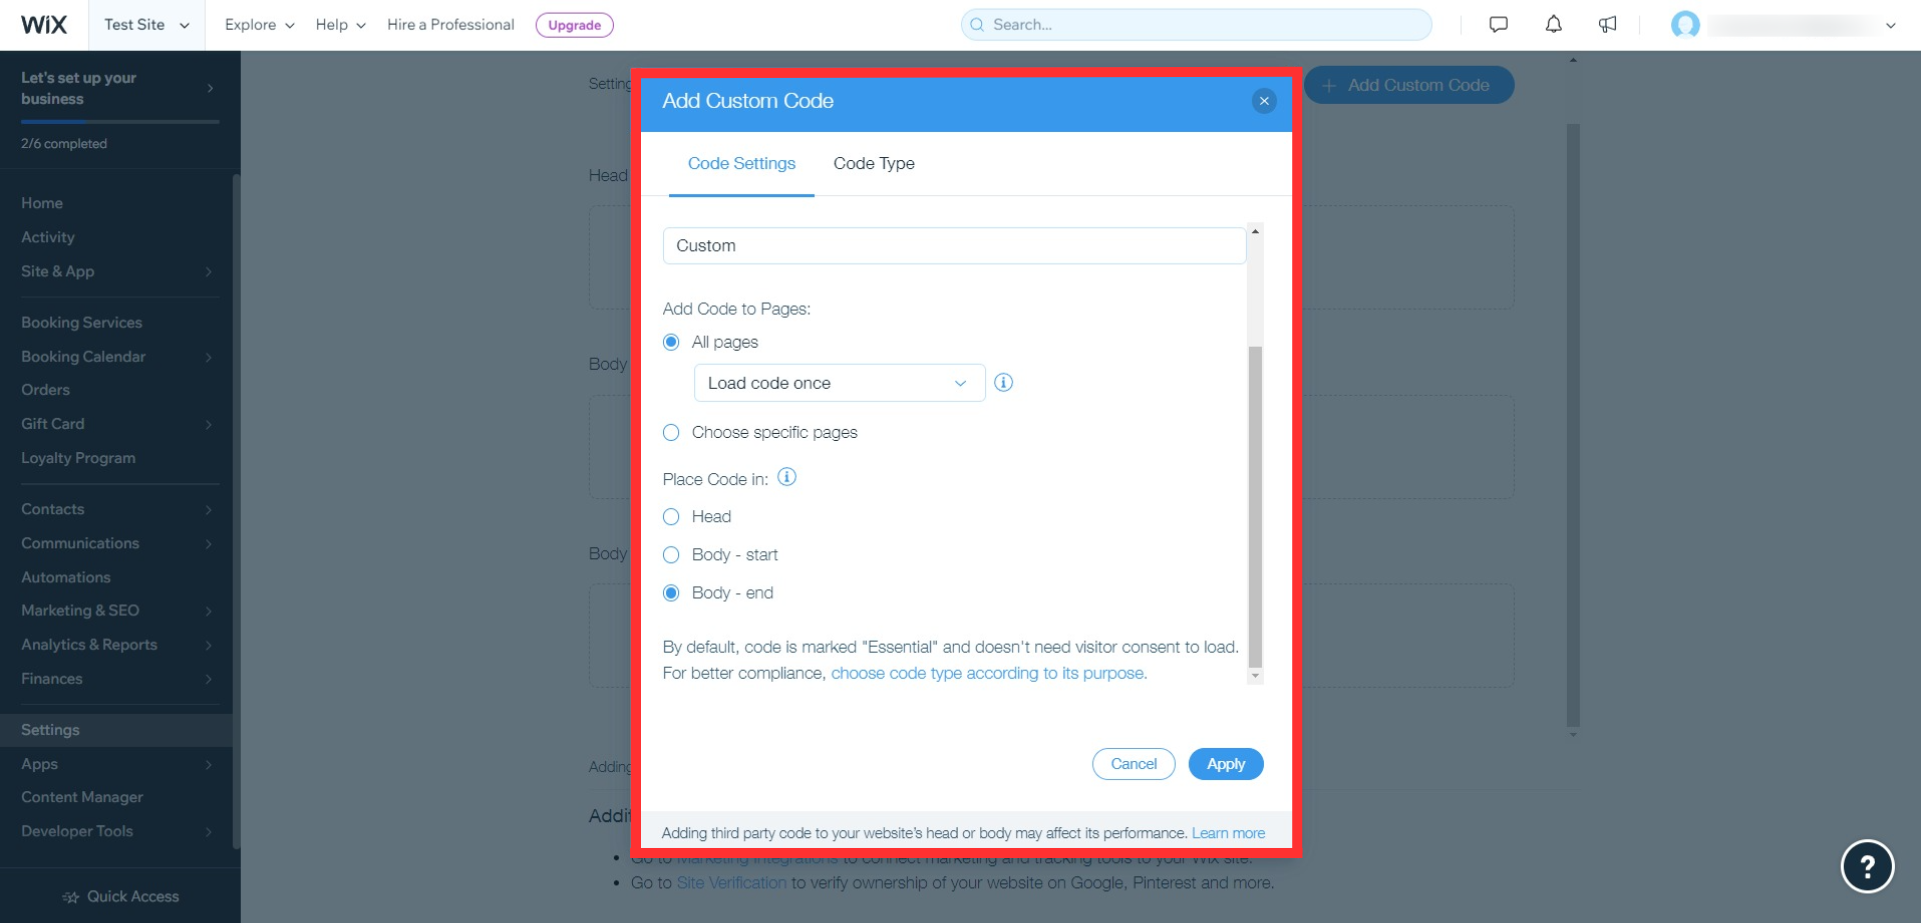
In the Code Settings, paste the Birdychat widget code into the text box.
Select the following:
-
Name: Custom
-
Add Code to Pages: All Pages ➞ Load code once
-
Place Code In: Body - End
Then, click the Apply button to confirm your settings.
Now, the widget will appear on every page of your Wix site.
Congratulations! 🎉 You can now start talking with your website visitors in real-time!
Option 2: Using an HTML Embed element
1. Log in to your Wix dashboard and open the Wix editor.
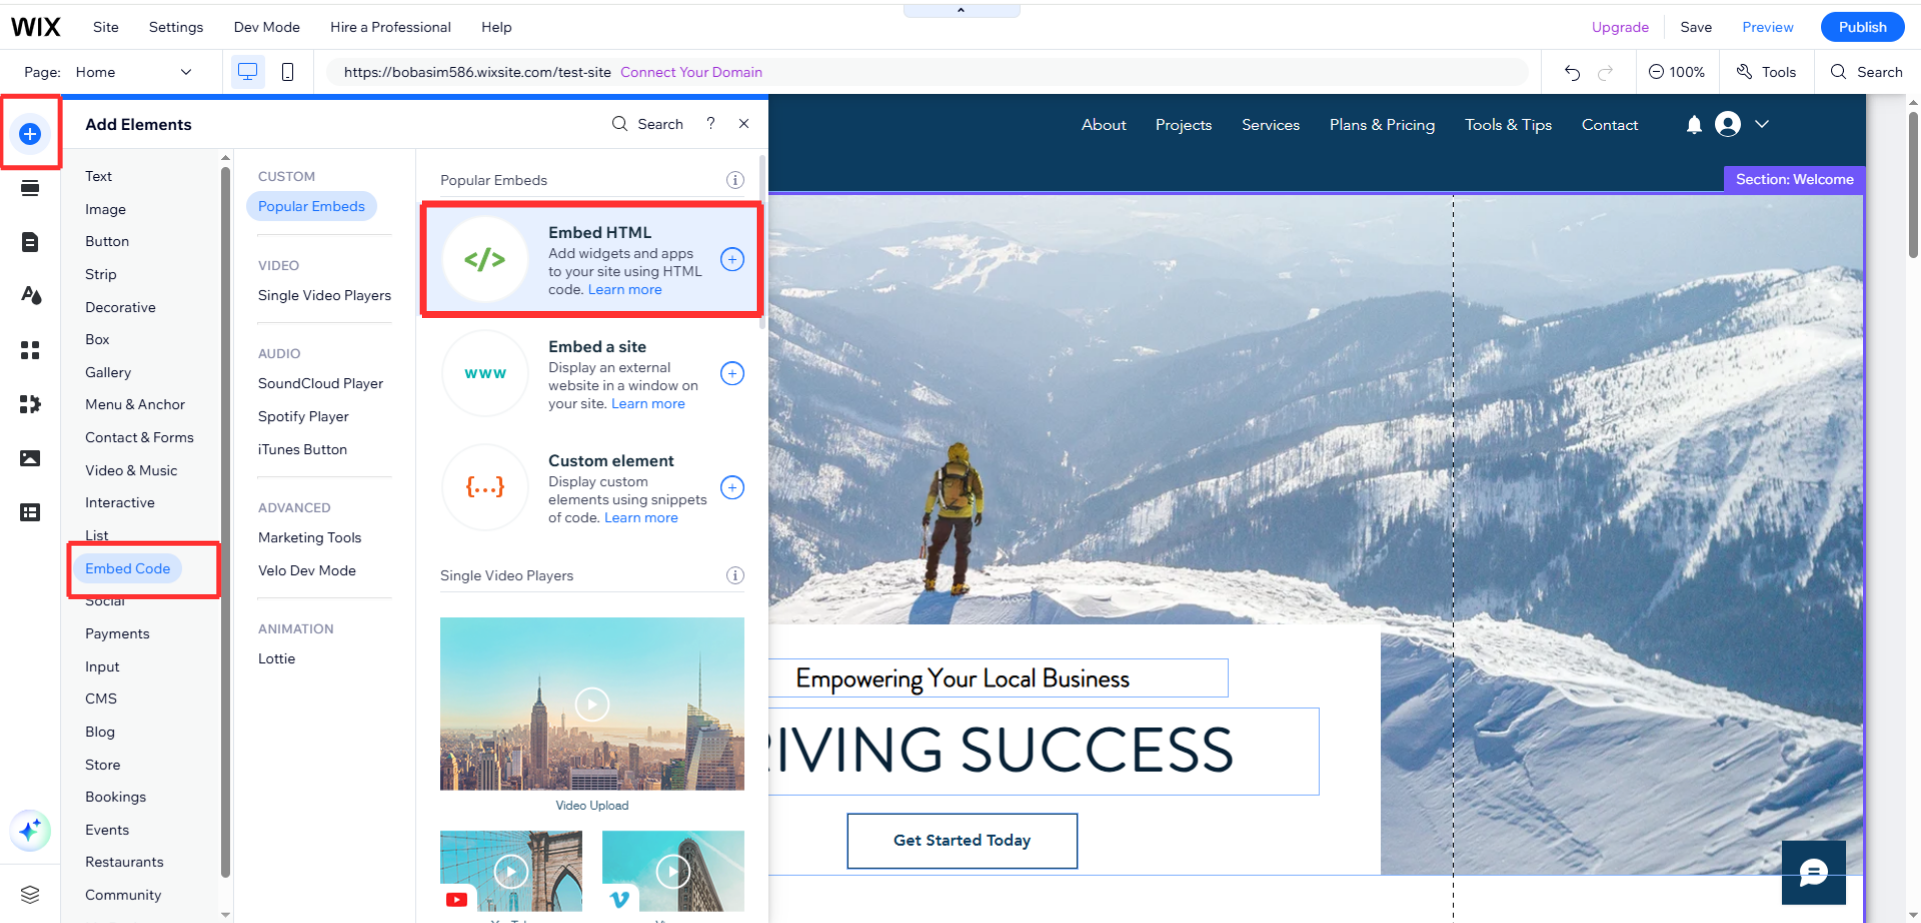
In the left icon menu, click the plus (+) icon to select Add Elements.
Select Embed in the left sidebar menu. Then, select Embed HTML under Popular Embeds or use the search bar to find it in the options to the right.
A new HTML box will appear:
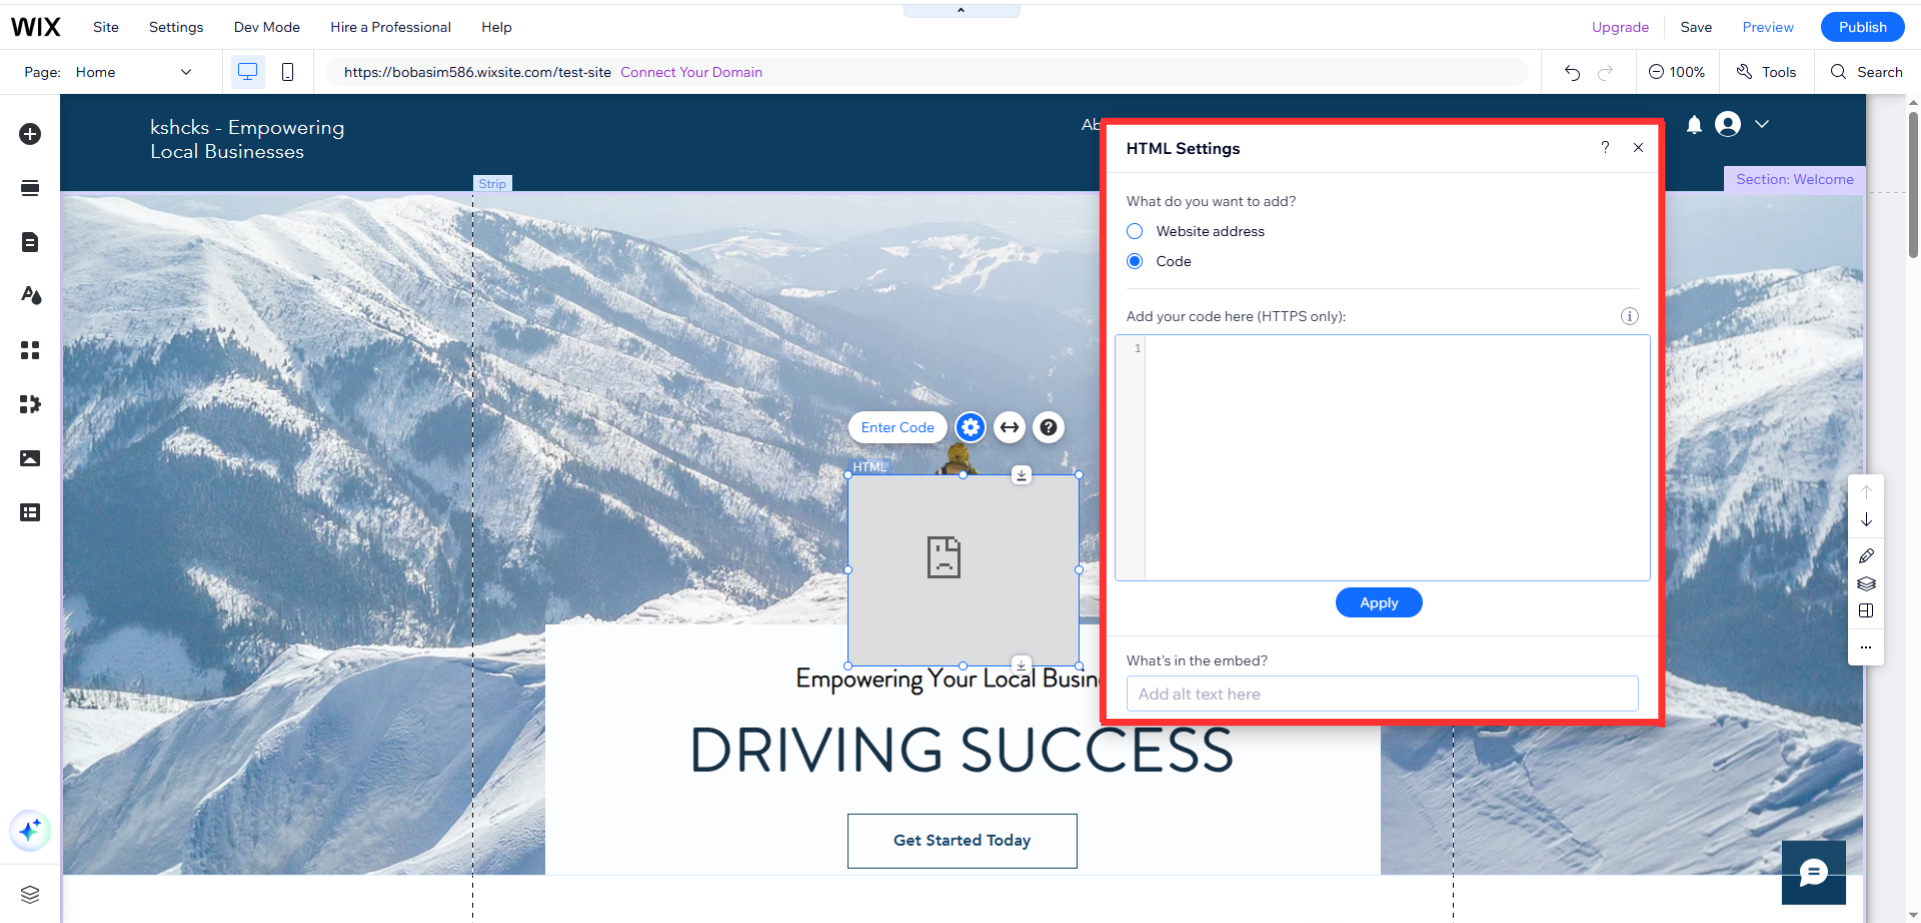
Select Code.
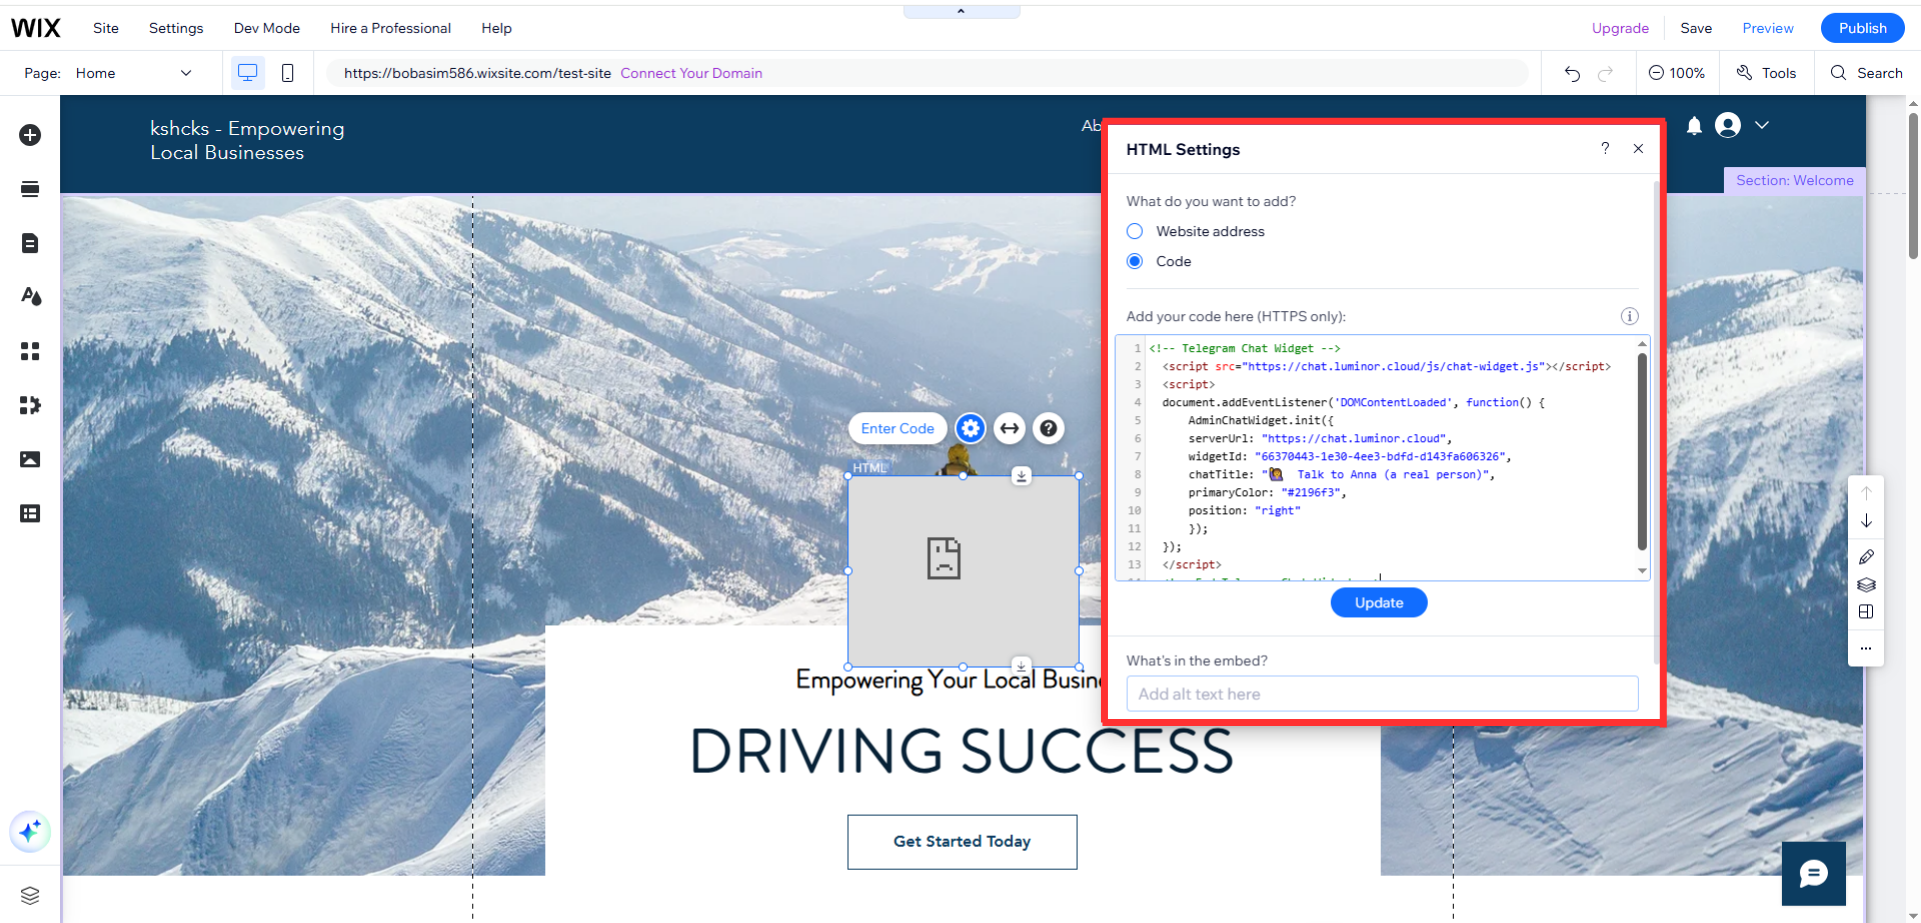
In the text field, paste the widget code you copied from your Birdychat dashboard and click the Apply button.
Then, close the HTML Settings box.
The Birdychat widget will now appear in the HTML box on your page.
2. Now we need to resize the new HTML box. Click the box once to highlight it. Then, drag it, change the size of the window here by entering values or expand the box manually by dragging it with your mouse.
Set the dimensions to the following:
Width: 400
Height: 620
The box should be big enough for the widget to expand when opened.

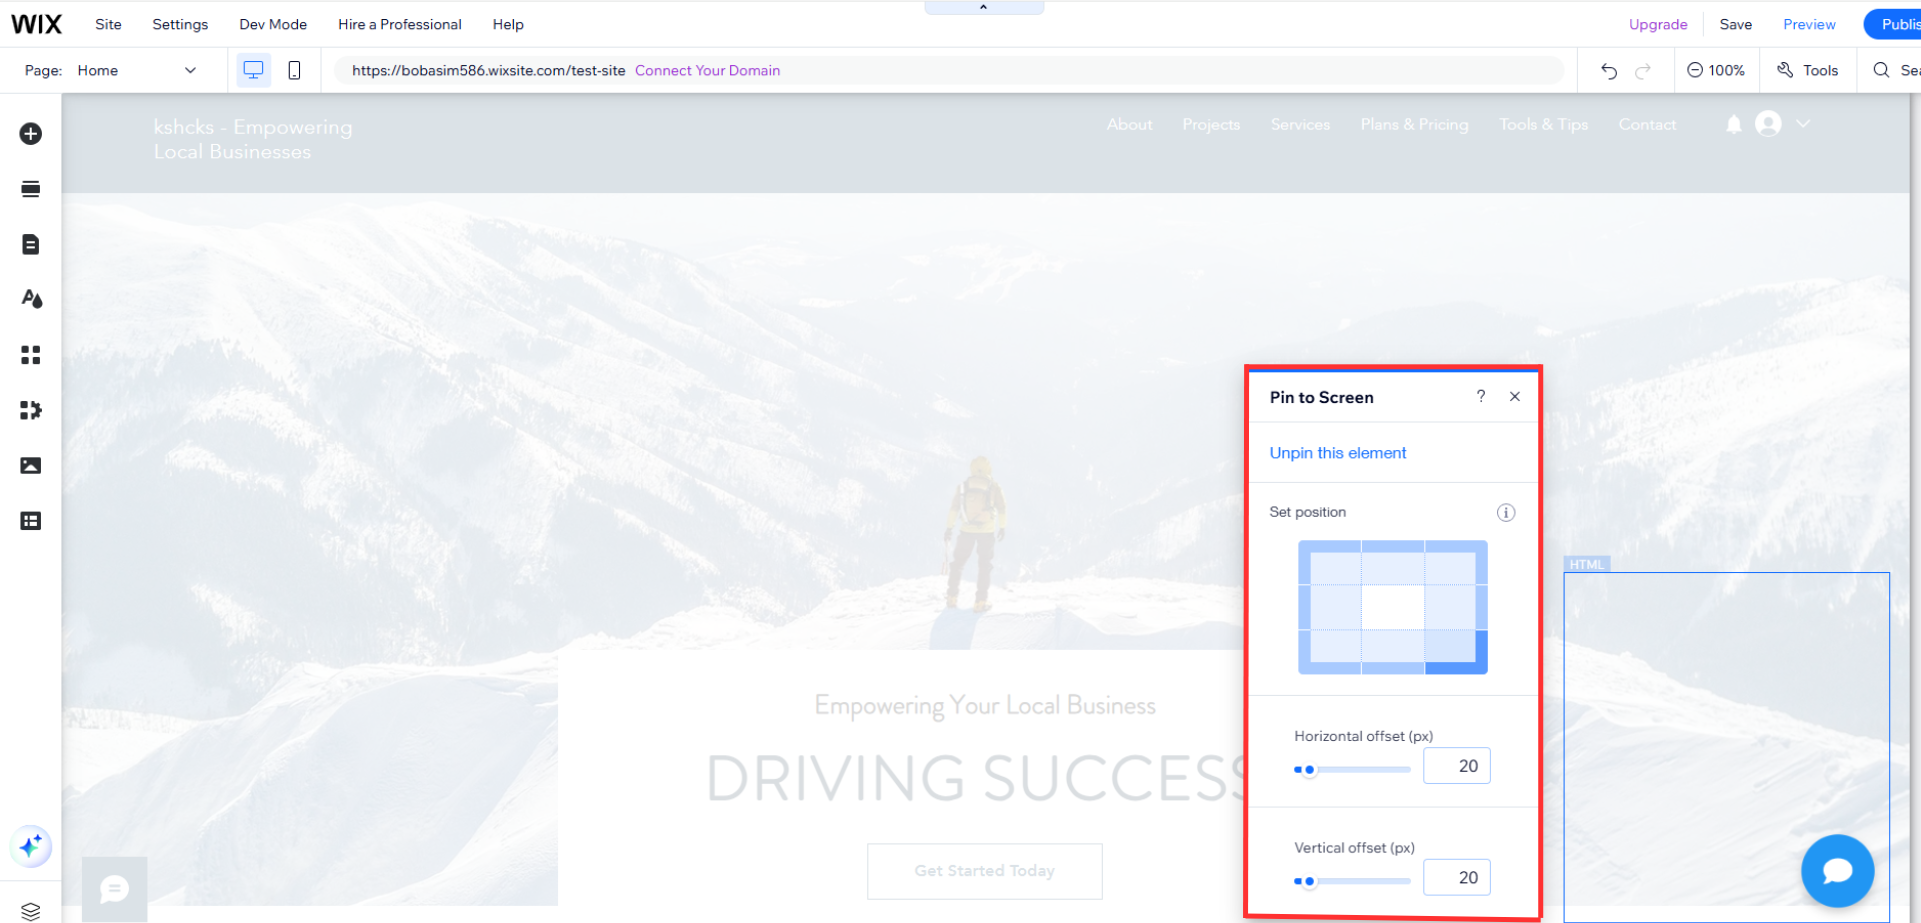
To freeze the position of your widget, right click on the HTML box and choose Pin to Screen. Then use the grid to choose the area where your widget will appear.
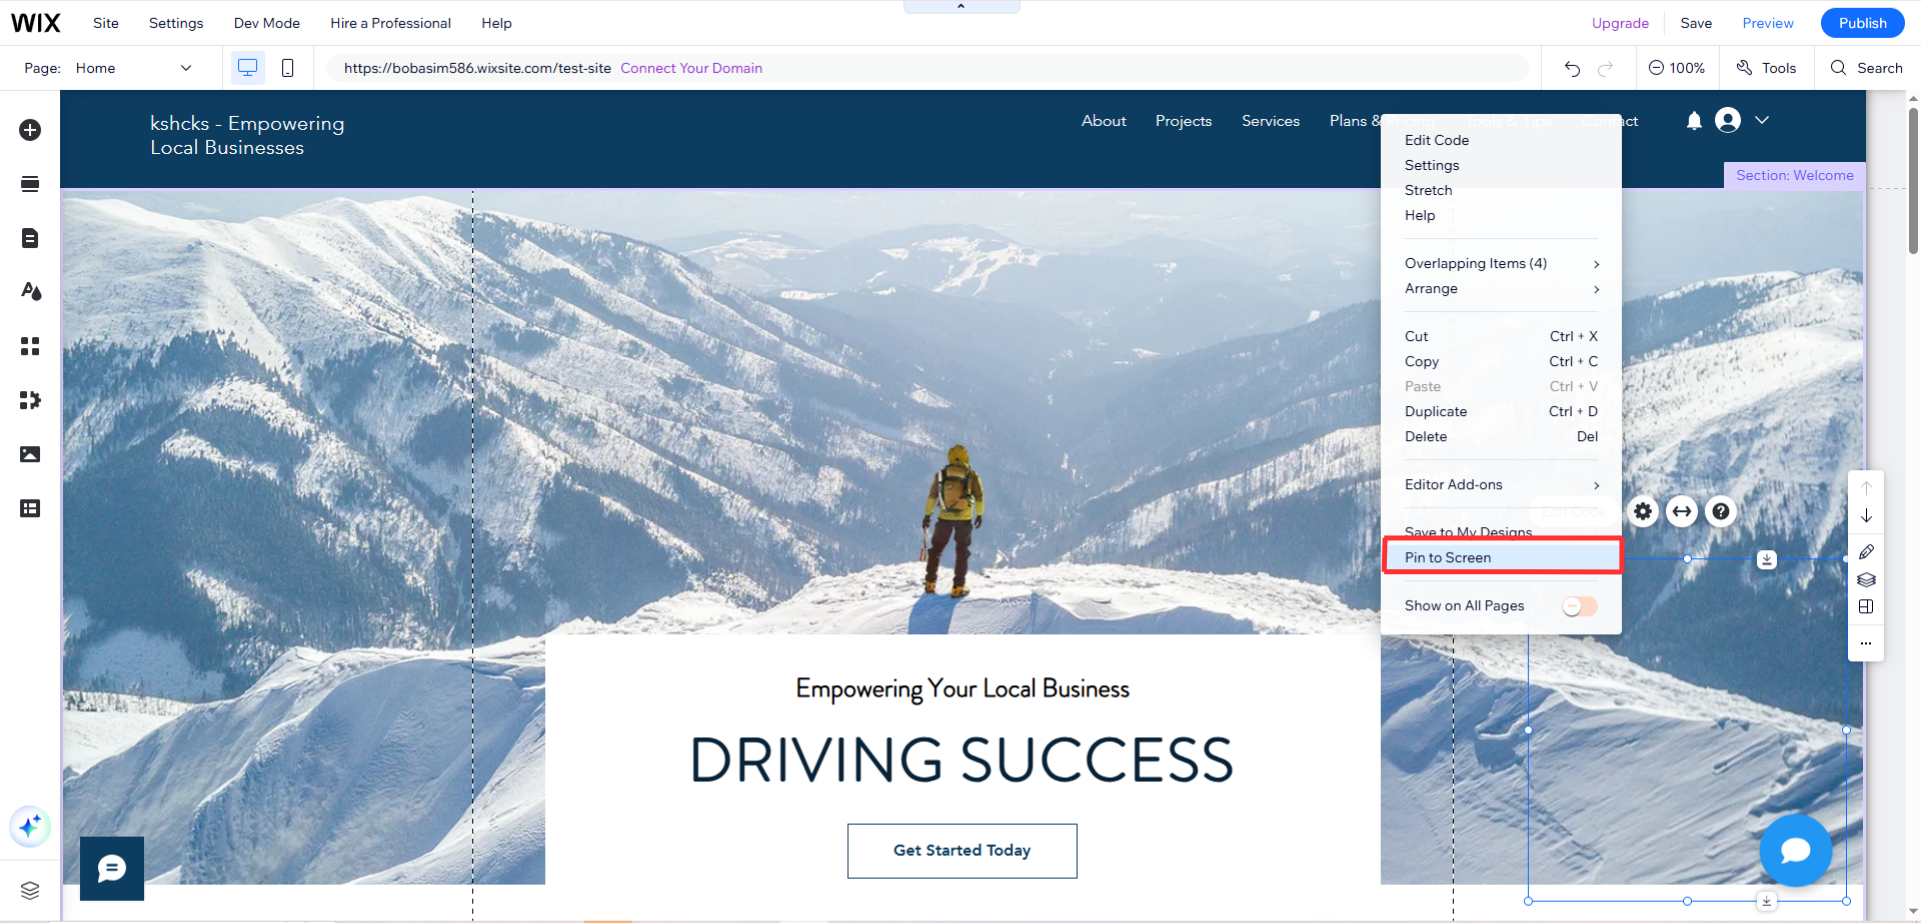
To fine-tune the placement and get your widget exactly where you want it, change the pixel values for the Horizontal offset and Vertical offset.
Click Preview in the upper-right of the Wix dashboard and check the widget.
Make sure when you click the widget it’s aligned to your satisfaction and the entire top of the widget is visible.
If you like what you see, scroll back up to the top of the page and click Publish. If not, you can drag the HTML box to make adjustments.
Congratulations! 🎉 You can now start talking with your website visitors in real-time!